Find in this Blog

Showing posts with label SAP portal. Show all posts

Thursday, January 12, 2023

Configuring SAP Java system SLD without Solution Manager.

Configuring SAP Java system SLD without Solution Manager.

Manual Configuration

Step: Login to Java system 

http://system.fqdn.local:50000/sld 


Click on Technical System , create new technical system 


Choose ASAABAP

Fill the ABAP system SID and installation number and host name ( Abap system license should be valid period)


ABAP system hostname , message server number ( goto SMMS tcode and check parameter for hostname) Next
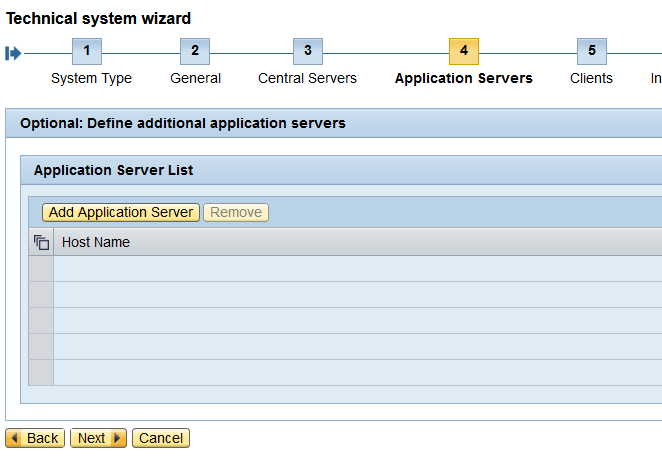

Next if you have additional application server mention here


Add client detail

add 000 Client and Business Client  and respective LOGICL SYSTEM NAME
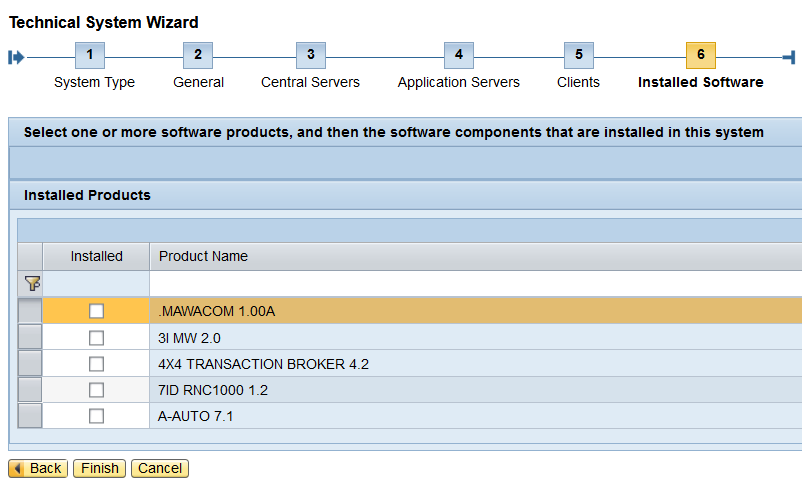
Choose the product of ABAP system ( S4HANA , NETWEVER 7.5, ECC6  etc)

Next> Finish.

Chose created Technical system and fill the following


General Tab

Make sure  System name

Installation Number

TMS Domain = DOMAIN_SID

TMS Group = GROUP_SID

Database Tab

Client Tab


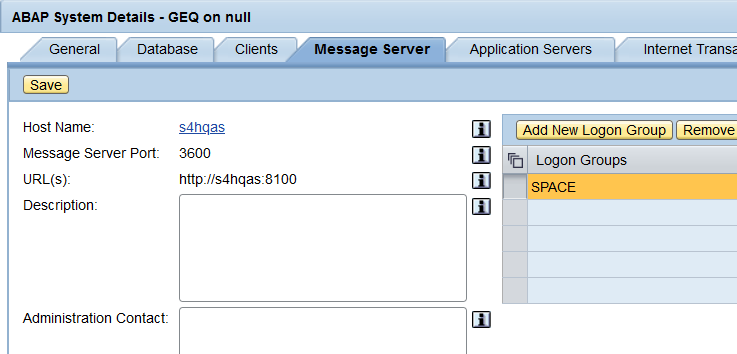
Message Server tab
=============================

Again go to Home and choose Business System 

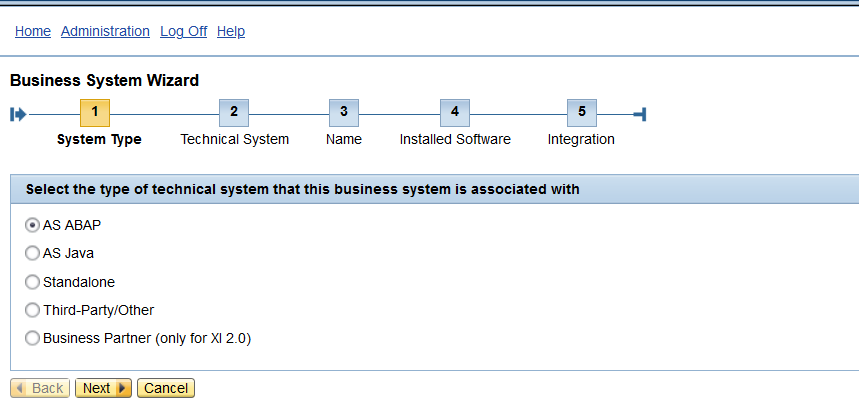
Choose New Business system >> AS ABAP
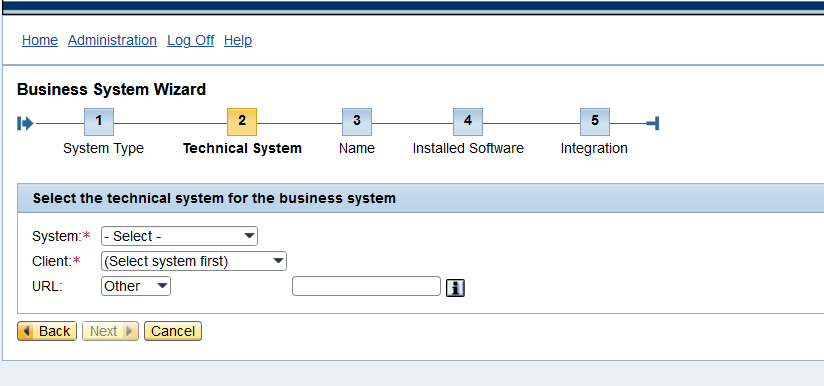
Choose Technical system previously created 

Eg: GEQ,Client=200
Enter Business System Name:  BS_GEQ_<client>

Next> Installed Software

Next Integrations, Choose Business system role= Application system

Related integration server = INTEGERATIO_ENGIN_JAVA

finish ===

Again Go Back Home Technical system check the Business system Tab, the integration is available 


login to ABAP system to verify the connection between JAVA & ABAP

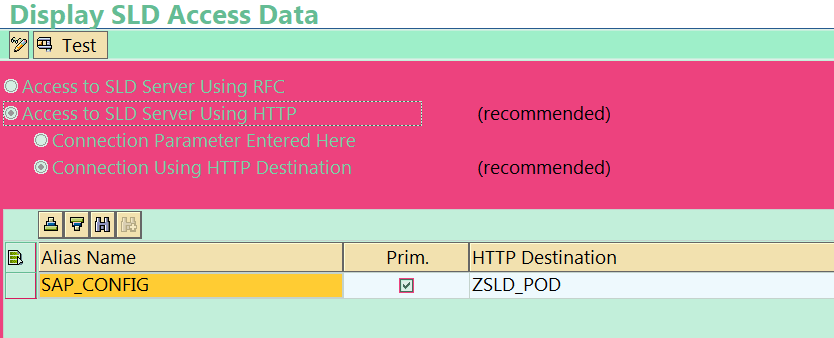
  1. Go to Txn SM59 create RFC >> HTTP External connection required to create. Host: Java system IP/host and Port number and userid/password.
  2. Go to Txn SLDAPICUST 


Choose the connection and click test if  RFC is configured properly  will get below result.
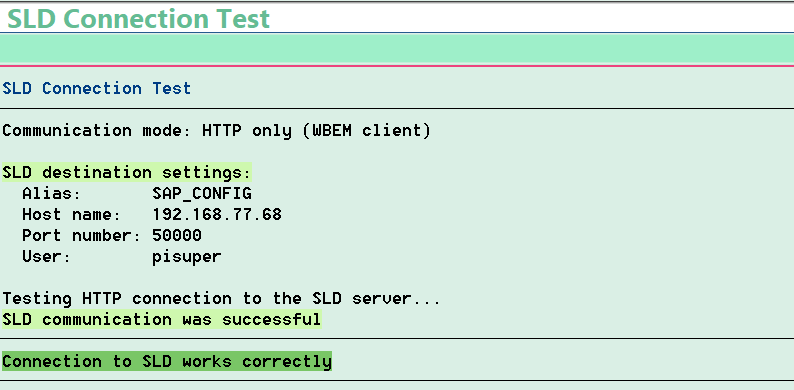

Go to Txn 
SLDCHECK to ensure working perfectly  this will redirect to java system Http


You have successfully created SLD 


Friday, April 3, 2015

Error: Remote access to the NetWeaver Administrator is forbidden. See SAP Note 1451753 for details.

Error: Remote access to the NetWeaver Administrator is forbidden. See SAP Note 1451753 for details.

Refer this note:1451753 - Filtering of administration requests for AS Java            


Add the entry on icm_filter_rules.txt

  • If you do not want to restrict access to the administration requests to certain clients, remove the lines from the file or turn the lines into a comment:

  •            #if %{REMOTE_ADDR} !stricmp 127.0.0.1 [AND]
               #if %{REMOTE_ADDR} !stricmp ::1
               #RegIRedirectUrl ^/webdynpro/resources/sap. com/tc~lm~itsam~ui~mainframe~wd/(.)*$ /nwa/remote_access_error [QSA]


    Thanks
    Yoonus

    Sunday, March 29, 2015

    Java portal to bw hana JCO error / Connection failed. Make sure that Single Sign-On is configured correctly


    Error> occured  >Sun Mar 29 11:11:28,123<   
    RfcException:
        message: Connect to message server host failed
    Connect_PM  TYPE=B MSHOST=xxxxxxx.LOCAL GROUP=PUBLIC R3NAME=XX MSSERV=sapmsXXX  PCS=1

    ERROR       partner xxxxxxxxxx:sapmsXXX' not reached
    TIME        Sun Mar 29 11:11:28 2015
    RELEASE     721
    COMPONENT   NI (network interface)
    VERSION     40
    RC          -10
    MODULE      nixxi.cpp
    LINE        3285
    DETAIL      NiPConnect2: 192.168.00.00:3600
    SYSTEM CALL connect
    ERRNO       10061
    ERRNO TEXT  WSAECONNREFUSED: Connection refused
    COUNTER     1

        Return code: RFC_FAILURE(1)
        error group: 102
        key: RFC_ERROR_COMMUNICATION

    ==============================


    Solution:
     
    The error saying that 3600 port is not communicating:192.168.00.00:3600(port name sapmsXXX) 
    We have two solution apply here
    • 1-first go to the host and telnet the port whether its working or not. If not working try to open that port.
     
    • 2- If you cannot able to open the port, go  service file and search the sapmsXXX you can see the port 3600 just change the port number 3609 or some other which is working.( on same 36xx series)
    And do the telnet with server name  3609 it will work with sapmsXXX. so careful about duplication of port. using the same service.
     
    This solution I did on JCO connection issues, not to other network issue.

    After changing the PORT it works fine for me.


    Thanks
    Yoonus
     

    Thursday, March 12, 2015

    SSO- Configuration

    How to configure the SSO (Single sign on) for Portal?  What are the steps needs to be taken?
     
    Single Sign On with Portal to SAP Backend Systems 
      
    Single Sign On (SSO) is good documented in the SAP world. This guide to give you a complete working example of how you can enable SSO in your environment.
    Step 1 - Setting the logon method as Single Sign on 
    1.1 Log in to your Portal as a System Administrator. 
    1.2 Choose System Administration --> System Configuration --> System Landscape
    1.3 Find the system you want to assign Single Sign on to and open it
    1.4 Choose User Management as Property Category
    1.5 Set Logon Method to SAPLOGONTICKET
    What we have done now is to set the system you want to use as a Single Sign On logon method. Do this to each system you want to connect.
    Step 2 - Create a Portal Certificate 
    1.1 Log in to the Visual Administrator
    1.2 Choose Server --> Services --> KeyStorage --> TicketKeystore
    1.3 Delete SAPLogonTicketKeypair-cert and SAPLogonTicketKeypair
    1.4 Choose Create (Create button in the Entry field) and  
    type in the following information: 
    a. mark Store Certificate  
    b. Common Name: Your <SID> (just example) 
    c. Entry Name: SAPLogonTicketKeypair  
    d. Store Certificate: Mark it 
    e. Key Length: 1024 
    f. Algorithm: DSA 
    g. Press Generate
    Now you will have two entries in the TicketKeyStore:
    SAPLogonTicketKeypair 
    SAPLogonTicketKeypair-cert
    Step 3 - Export the Portal certificate 
    3.1 Choose Server --> Services --> KeyStorage --> TicketKeystore
    3.2 Choose SAPLogonTicketKeypair-cert and press Export (Export button in the Entry field)
    a. Fill in a name of the Certificate 
    To keep track of your certificate, call it the SID of the Portal
    b. Choose either X.509 or Base64 Encoded Format
    Step 4 - Import the Portal certificate to the Backend System 
    4.1 Log in to the Backend System 
    In my example, I log in to ERP 2004
    4.2 Run transaction STRUSTSSO2
    4.3 Press Import Certificate (Button in the Certificate field)
    a. Open the generated certificate from step 3 with the right file format that you choosed in step 3.4
    4.5 Press Add to Certificate List button (Button in the Certificate field)
    4.6 Press Add to ACL button (Button in the Certificate field)
    a. Enter the <SID> of your Portal
    b. Enter Client 000
    4.7 Press Save
    Step 5 - Export the Backend certificate to your Portal
    5.1 You are still in the transaction STRUSTSSO2. Doubleclick the Owner Certificate and choose Export and store in on the file system
    5.2 Log into Visual Administrator 
    Choose Server --> Services --> KeyStorage --> TicketKeystore and press Load and choose the Certificate
    5.3 Set the Backend System as "ACL" in the Portal 
    Choose Server --> Services --> Security --> Provider --> Ticket
    Choose the Authentication tab and add the following on the com.sap.security.core.server.jass.EvaluateTicketLoginModule:
    trustedsys<Number>=<ABAP_SID>, <CLIENT> (for example, ABA, 200)
    trustediss<Number>=<ISSUER_DISTINGUISHED_NAME> (for example, CN= ABA)
    trusteddn<Number>=<SUBJECT_DISTINGUISHED_NAME> (for example, CN=ABA)
    You have set up a trusted relationship between your portal and the backend system. To do so with several system, run this guide again from step 4