Find in this Blog

Thursday, January 12, 2023

Configuring SAP Java system SLD without Solution Manager.

Configuring SAP Java system SLD without Solution Manager.

Manual Configuration

Step: Login to Java system 

http://system.fqdn.local:50000/sld 


Click on Technical System , create new technical system 


Choose ASAABAP

Fill the ABAP system SID and installation number and host name ( Abap system license should be valid period)


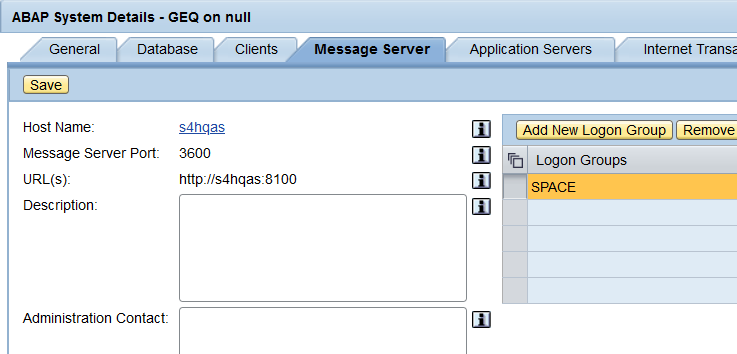
ABAP system hostname , message server number ( goto SMMS tcode and check parameter for hostname) Next


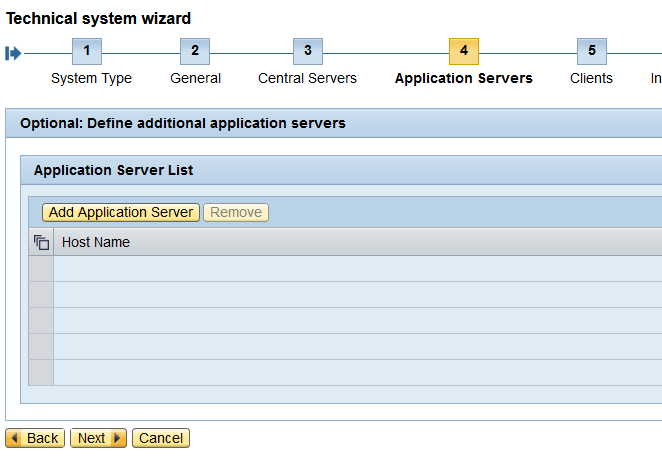
Next if you have additional application server mention here


Add client detail

add 000 Client and Business Client  and respective LOGICL SYSTEM NAME

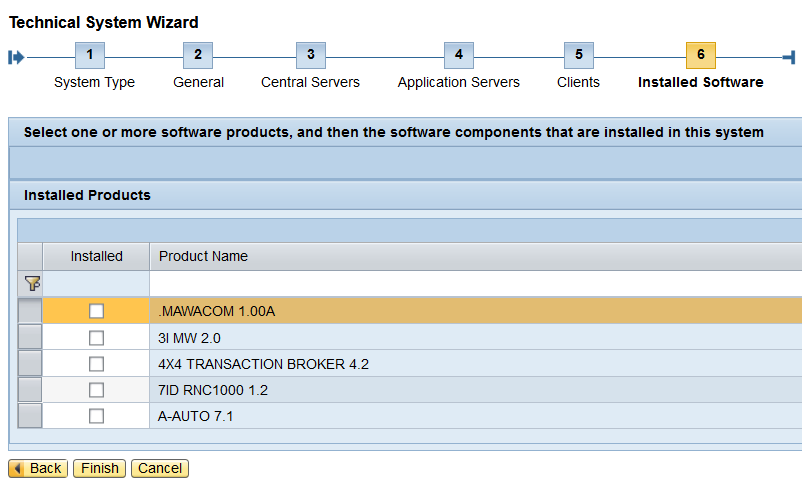
Choose the product of ABAP system ( S4HANA , NETWEVER 7.5, ECC6  etc)

Next> Finish.

Chose created Technical system and fill the following


General Tab

Make sure  System name

Installation Number

TMS Domain = DOMAIN_SID

TMS Group = GROUP_SID

Database Tab

Client Tab


Message Server tab

=============================

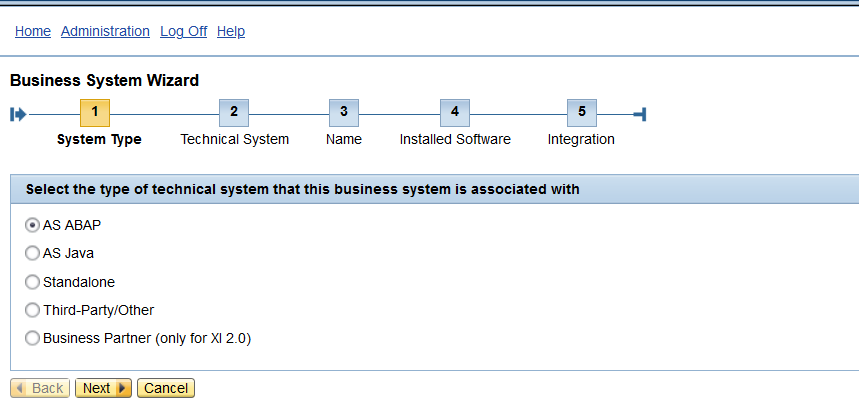
Again go to Home and choose Business System 

Choose New Business system >> AS ABAP

Choose Technical system previously created 

Eg: GEQ,Client=200

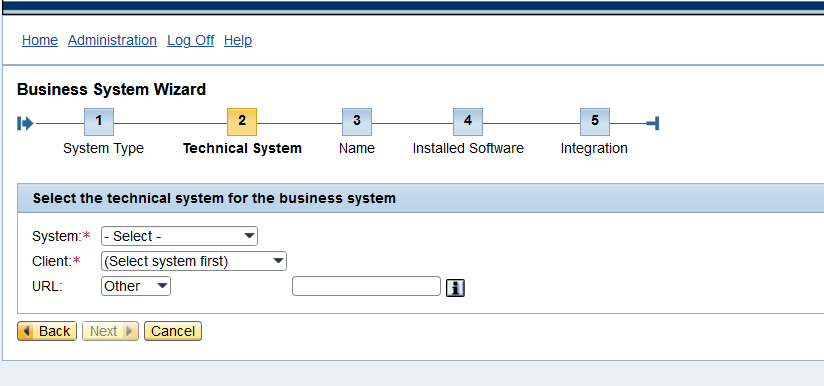
Enter Business System Name:  BS_GEQ_<client>

Next> Installed Software

Next Integrations, Choose Business system role= Application system

Related integration server = INTEGERATIO_ENGIN_JAVA

finish ===

Again Go Back Home Technical system check the Business system Tab, the integration is available 


login to ABAP system to verify the connection between JAVA & ABAP

  1. Go to Txn SM59 create RFC >> HTTP External connection required to create. Host: Java system IP/host and Port number and userid/password.
  2. Go to Txn SLDAPICUST 


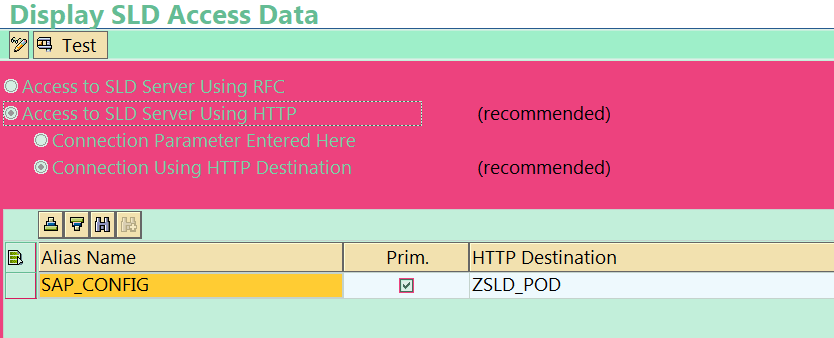
Choose the connection and click test if  RFC is configured properly  will get below result.


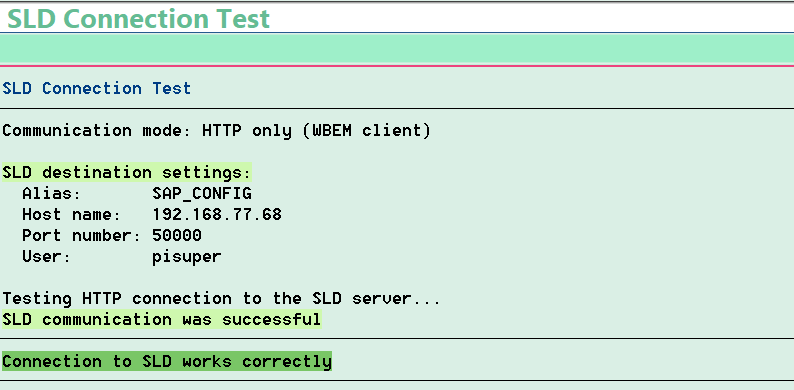
Go to Txn 
SLDCHECK to ensure working perfectly  this will redirect to java system Http


You have successfully created SLD 


Wednesday, January 11, 2023

How to create copy of root user as root ?

 Premise: using sudo (as suggested by the accepted answer) probably is the correct solution at your problem.

That said, if you really need something resembling a second root account, you can create an alias to the system root account.

To do that, follow these steps:

  1. open /etc/passwd
  2. locate the root account line (often the very first line). It will be something similar to root:x:0:0:root:/root:/bin/bash
  3. copy/paste it changing the first root occurence in root2 (ie: changing it in root2:x:0:0:root:/root:/bin/bash)
  4. save your changes and exit the text editor
  5. issue passwd root2 and enter the new password

Note: if you whish, you can avoid direct editing the /etc/passwd file by replacing steps 1-3 with the following command: useradd -o -u 0 -g 0 -N -d /root/ -M root2 (see useradd --help for more information about the required options)

At this point, you can login using not only the original root account (with its original password), but also using the new root2 account (with its new password).

Anyway, remember that it is an alias of an existing user, rather than a completely new user. This means that any files created while logged as root2 have the very same numerical oid/gid of the original system root account (which has 0 as both uid and gid).


Thansk

Yoonus

Saturday, January 7, 2023

EMC-NETWOKER backinit HANA BACKUP RESTORE 19.X HANA 2.>=0


EMC-NETWOKER backinit HANA BACKUP RESTORE 19.X HANA 2.>=0


This Blog explain the restore steps of using backint from Dell EMC netwoker software

Expample:

Source machine name: s4hhdb1
Source Bakup pool: S4HPRD
Source tenant DB: SH1
Target machine name: testdbr2
Backup media server name: emcbackup137
Target tenant DB: SH1

FQDN= yoonus.local


The following  Changes to be made in source client GUI.. login Networker
> select source> modify the property t go to global2 add target machine host name, IP FQDN for full permission of access ( Full Permission= *@* )


Changes in Target machine (.utl)Files

Go to Target machine ( initSID.utl) file location and edit the file /usr/sap/TST/SYS/global/hdb/opt


##NSR_CLIENT=testdbr2.yoonus.local( target)
NSR_SERVER=emcbkp137.yoonus.local
NSR_CLIENT=s4hhdb1.yoonus.local ( source Client name)
NSR_RECOVER_POOL=S4HPRD (update source machine backup pool, the backup which need to restore from)
NSR_PARALLELISM=20
NSR_DEBUG_LEVEL=9
NSR_DPRINTF=true
NSR_DIAGNOSTIC_DEST = /nsr/applogs ( keep more space for this path)
NSR_DATA_VOLUME_POOL=TEST (optional)


Opt Location Files: /usr/sap/SID/SYS/global/hdb/opt
Following files should be in opt location: ( give full permission)
hdbbackint
initSID.utl
nsrsapsv.cfg


(nsrsapsv file details)

DATABASES=SYSTEMDB,TST (tenantdb)
HANA_BIN=/usr/sap/TST/HDB00/exe
HANA_DYNAMIC_PREFIX=FALSE
HANA_INSTANCE=00
HANA_MDC=TRUE
HANA_SID=TST
TENANT_ADMIN=FALSE


CHANGES IN HANA STUDIO SOURCE AND TARGET

Apply the below parameters based on respective source and target( HANA parameter in studio)

Global.ini>>backup>>

Catalog_backup_parameter_file = /usr/sap/SID/SYS/global/hdb/opt/initSID.utl
Catalog_backup_using_backint= true
Data_backup_parameter_file= /usr/sap/SID/SYS/global/hdb/opt/initSID.utl
Log_backup_parameter_file= /usr/sap/SID/SYS/global/hdb/opt/initSID.utl
Log_bakup_using_backint= true
Parallel_data_backup_backint_channels= ( based on sessions you need for fast restore)


HANA STUDIO CONSOLE STEPS
——————————

Restore select as tenant database

select :Recover the database a specific data backup

select: Search for the backup catalog in backinit only

Tick: Backinit system copy

SH2@SH2

DB will restart

after it will fetch the available backup logs to select and restore.